

Technology Guide
How to choose a UV lamp
Wavelength first, then power, then geometry. A step-by-step guide to matching a UV curing light source to your material and process.
Technology Guide
How UV LED area sources cure whole parts, trays and coated surfaces in one exposure, and how to size the emitting area, irradiance and cooling.
Flood curing irradiates a whole area at once. Instead of following individual bond points, an area light source covers a complete part, a tray of parts or a coated panel, and cures everything within its field in a single exposure. It is the technique of choice for batches, larger bonds and coatings on stationary parts, and the basis of UV curing ovens and many conveyor systems.
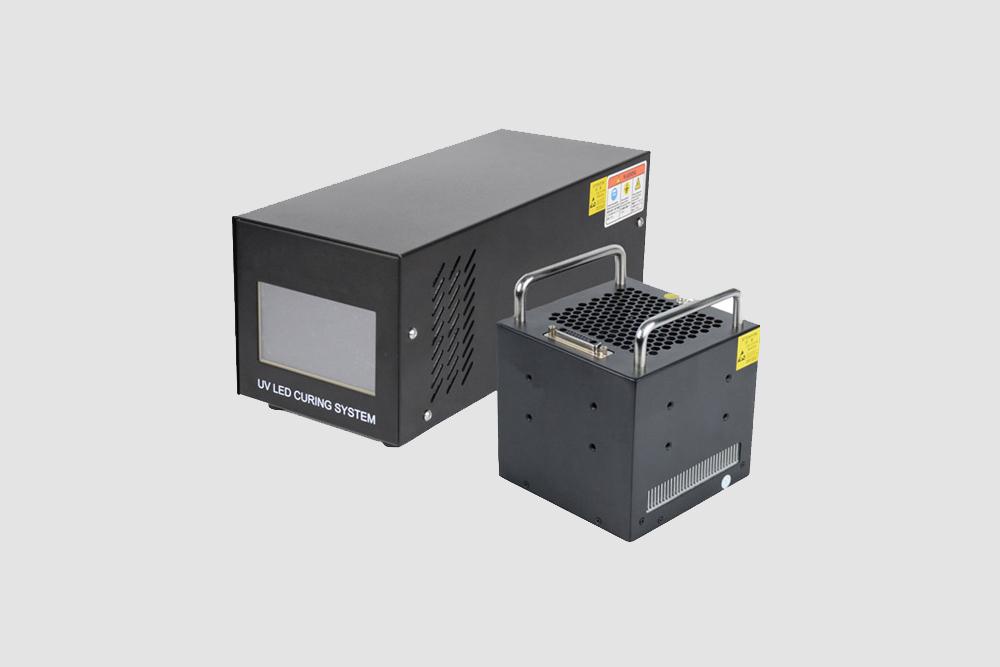
An area light source is an array of UV LEDs behind a protective window, cooled by fans or by water. A controller sets the output and the exposure time, and starts the exposure from a button, a foot switch, a sensor or a PLC.
The part is placed under the source, usually in a fixture or on a conveyor, at a defined distance. Every point within the field receives light at the same time, so the whole part cures together. Many sources can be dimmed and switched in sections, so the exposure can be matched to different parts.
An area source has to spread its output over a large field. Its peak irradiance is therefore lower than that of a focused spot head, and it falls as the emitting area grows. Small, compact heads reach the highest values; large fan-cooled panels deliver less per square centimetre; water cooling allows much more power in the same area.
For flood curing, uniformity matters as much as peak irradiance. Close to the window, the individual LEDs can produce a pattern of brighter and darker spots. A little further away, the light from neighbouring LEDs overlaps and the field becomes more even, but the irradiance falls. Area sources are usually specified at a working distance of about 10 mm.
The irradiance also drops towards the edges of the field. Choose an emitting area larger than the part, so that its corners and edges receive enough light.
The material data sheet gives the dose and usually a minimum irradiance. A stationary flood exposure makes dose easy to control: set the time on the controller. If the irradiance is too low, a longer exposure may still leave a tacky surface, because oxygen inhibits the cure at the surface. In that case a more powerful source, a shorter working distance or an LED-optimised formulation helps.
Measure the irradiance across the field, not only in the centre, with a UV Radiometer when you set up the process.
Area sources are available at 365, 385, 395 and 405 nm. Use the wavelength your adhesive or coating is formulated for. Longer wavelengths penetrate further into thick, filled or pigmented layers, while 365 nm suits many general-purpose adhesives and formulations derived from mercury-lamp chemistry.
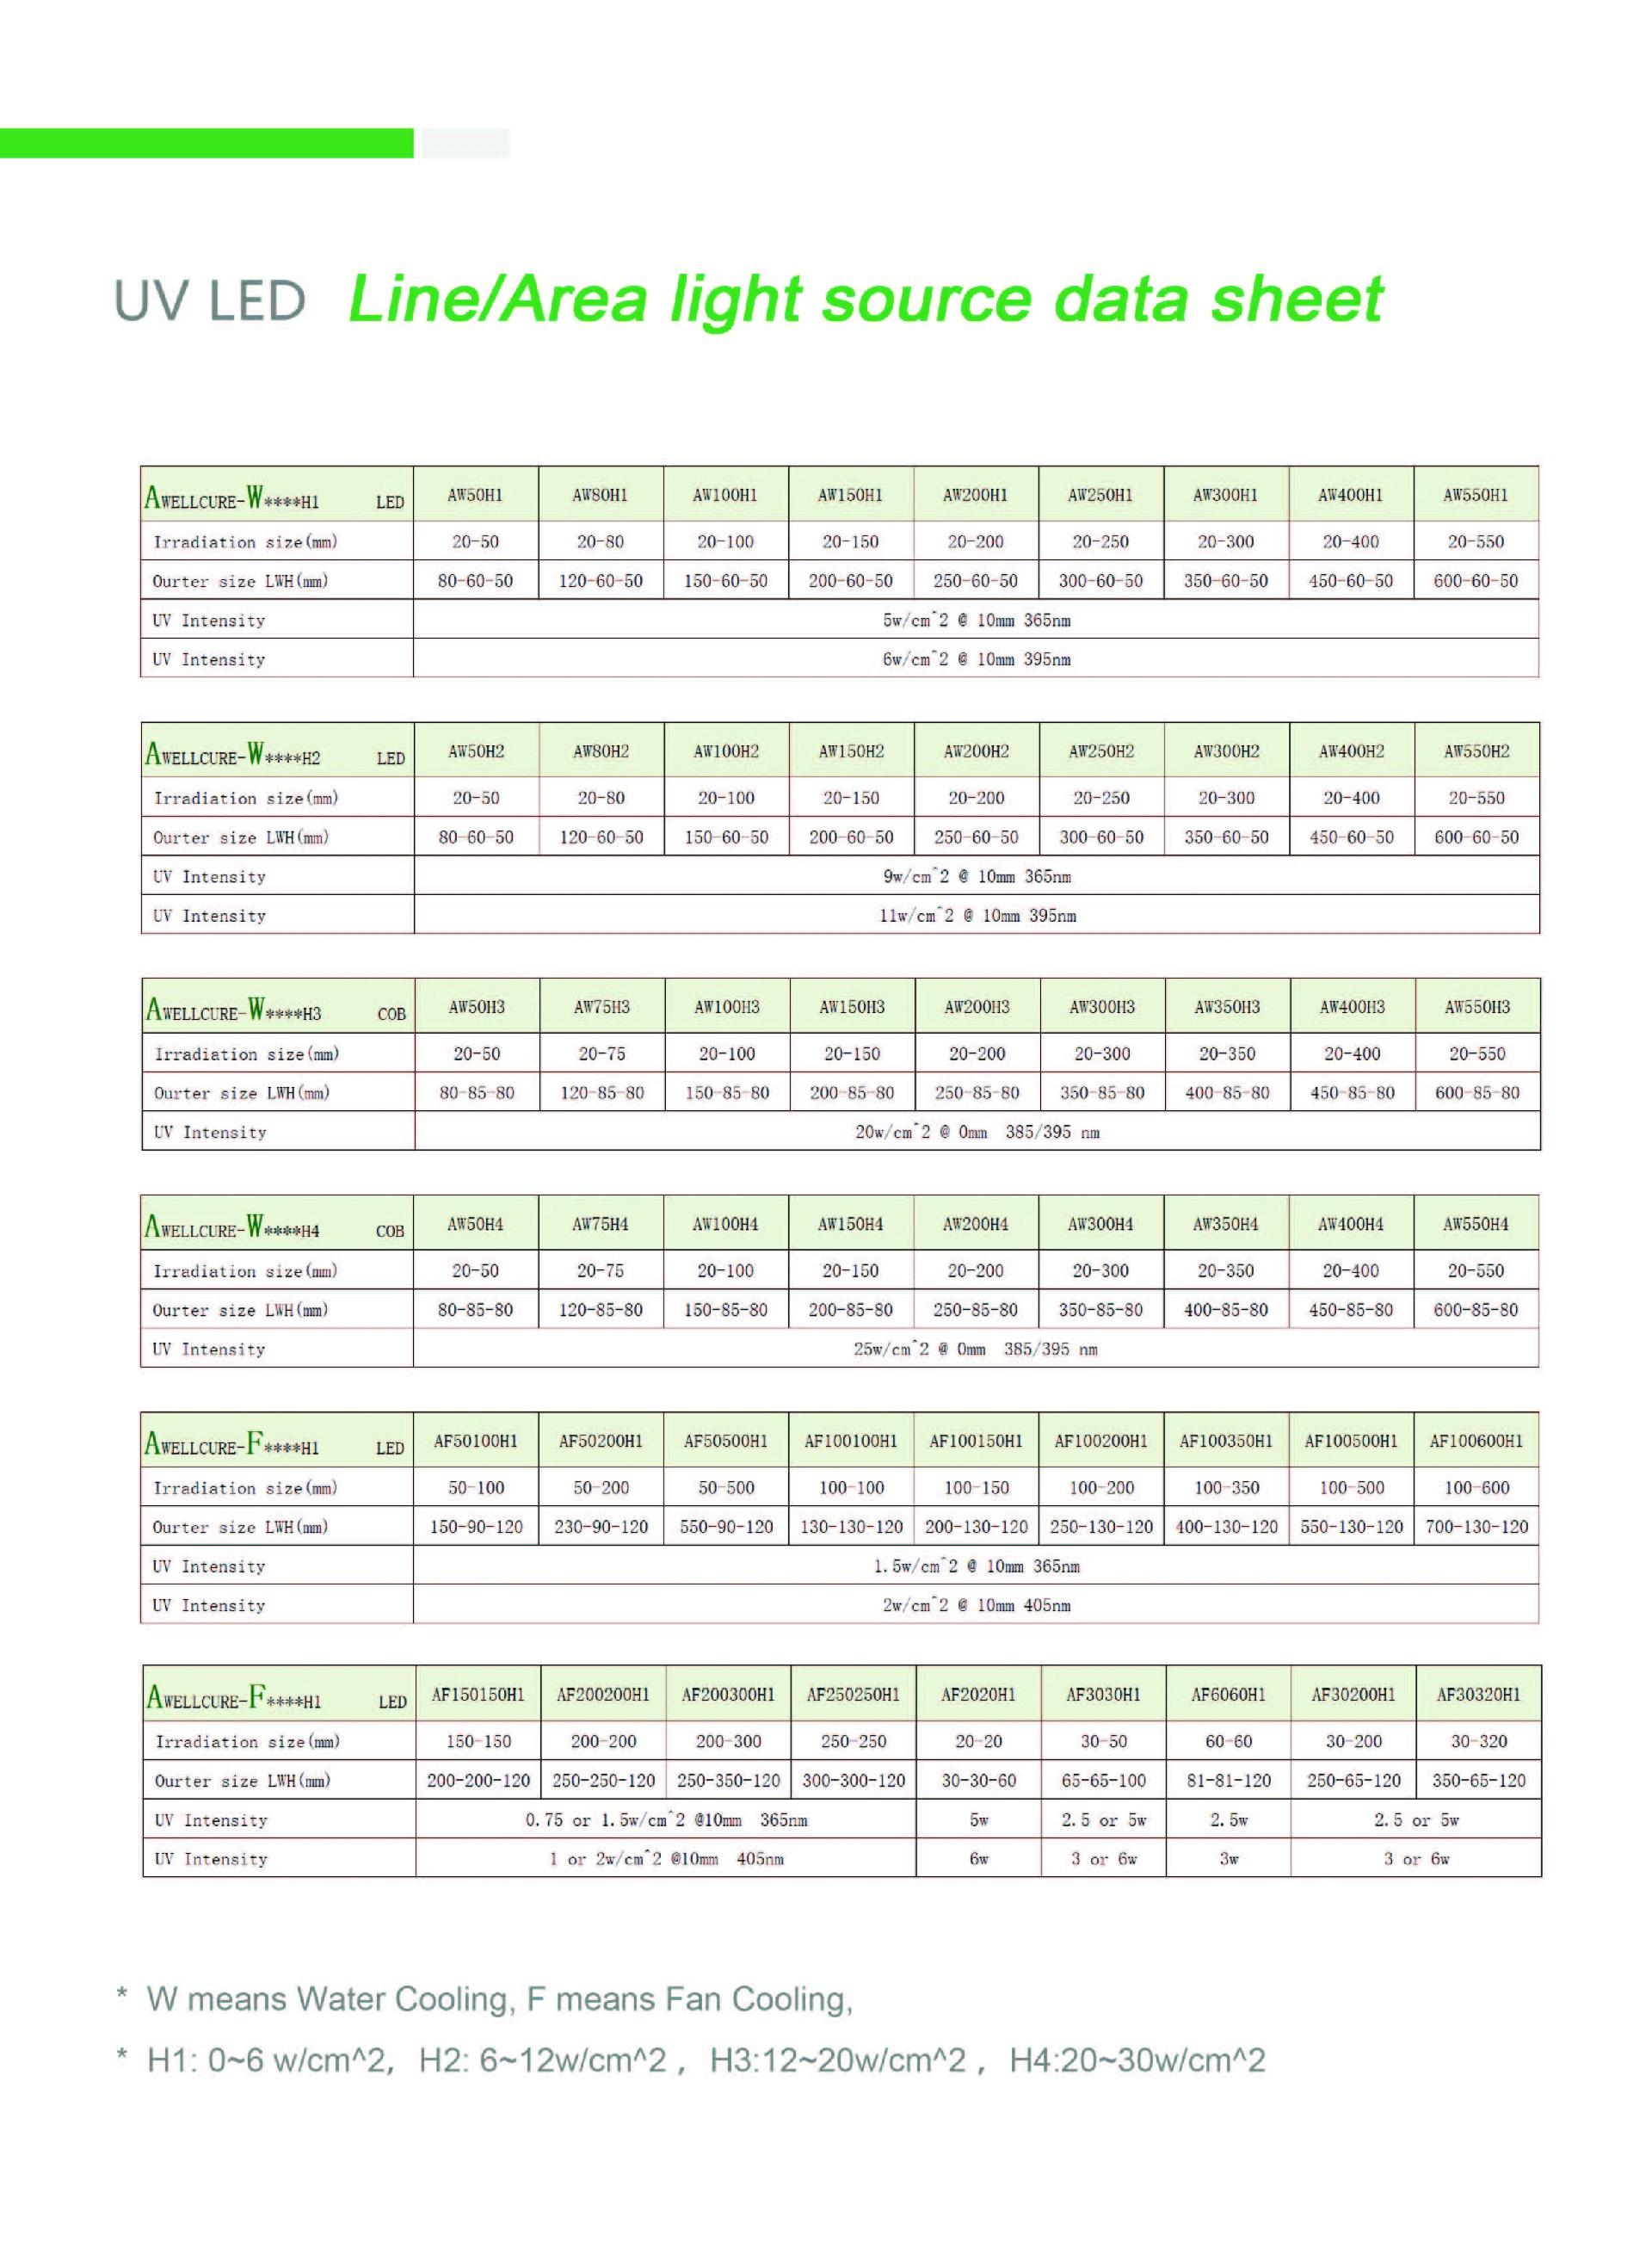
Awellcure UV LED Area sources range from 20 × 20 mm, with a peak irradiance of 5,000 mW/cm², to fan-cooled panels of 400 × 400 mm and 250 × 600 mm. Water-cooled sources reach 6 to 25 W/cm². Their controllers start exposure from external signals, a foot switch or a sensor, provide status outputs for start, stop, working and alarm, and can be programmed through RS232. The same technology is built into enclosed UV Curing Ovens and UV Conveyor systems.
Technology Guide
Wavelength first, then power, then geometry. A step-by-step guide to matching a UV curing light source to your material and process.
Technology Guide
How focused UV LED heads cure adhesive exactly where it is dispensed, and how to choose lenses, wavelength and controller for precise bonding of small parts.
Technology Guide
How a narrow band of UV LED light cures coatings, inks and adhesives as parts or webs move past, and how to size a linear source for your line speed.
Expert advice
Tell us about your parts, adhesive or coating and cycle time, and we recommend a spot, linear or flood system.