

Skip to content

Technology Guide

How to choose a UV lamp

Wavelength first, then power, then geometry. A step-by-step guide to matching a UV curing light source to your material and process.
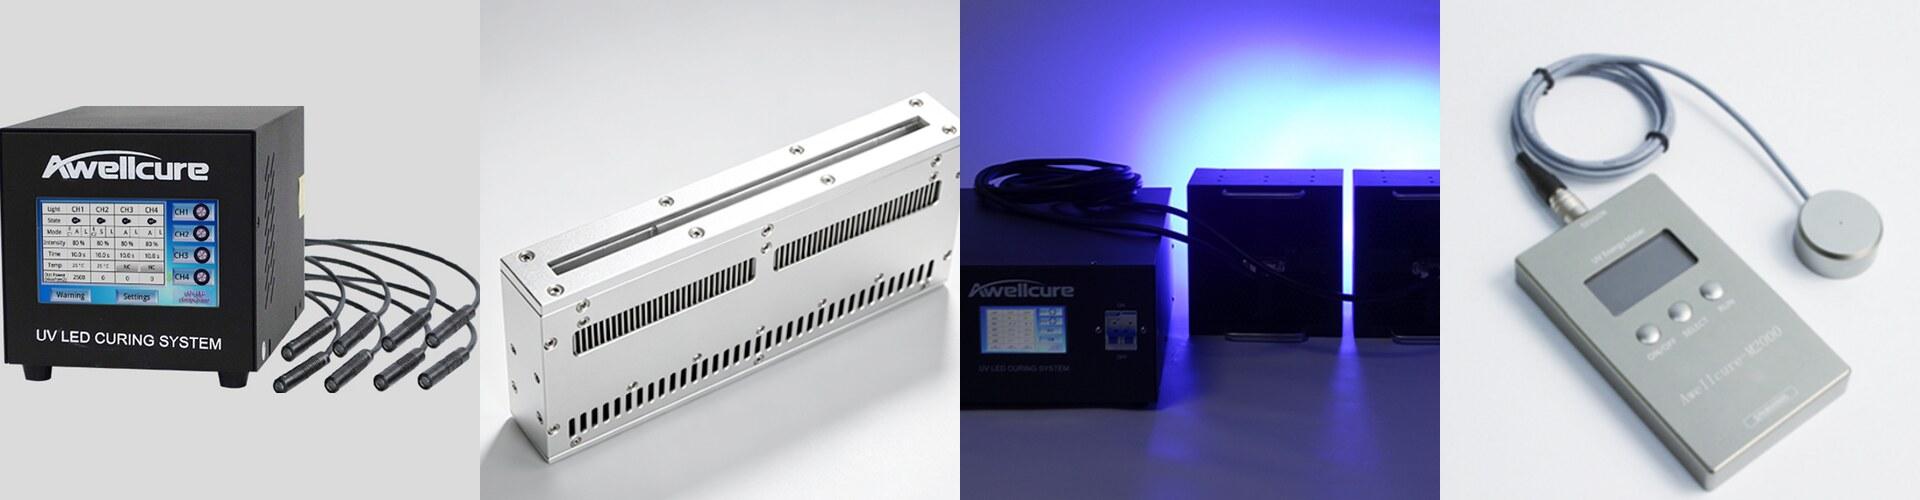
Four Awellcure products side by side, an 8-channel UV LED spot curing controller, a linear light source, two lit area light sources with their controller, and a handheld UV radiometer

Wavelength, power, spot size, divergence, uniformity, light guides, service life, cooling: a UV light source has many parameters. Some must be settled first, some decide precision, and some decide what the source costs you over the years. This guide takes them in the order that works in practice.

A successful UV curing process rests on three things that must fit together: the right product design, the right exposure and the right chemistry.

  • Chemistry: the resins, monomers, photoinitiators and additives in the formulation, how strongly they absorb each wavelength, how efficiently that light starts the reaction, and how thick the layer is.
  • Exposure: the spectrum of the light source, its irradiance, the exposure time, and the heat it brings to the part.
  • Product: the substrate, how the material is applied and how much of it, the line speed, and the properties the finished part must have, such as hardness, gloss, scratch resistance or adhesion.

The light source is the exposure part of that equation. Choose it in this order: wavelength, then power, then irradiated area and geometry, then the remaining details.

1. Wavelength: start with the material

UV curing works because a photoinitiator in the adhesive, ink or coating absorbs light at specific wavelengths and starts the cross-linking reaction. If the light source does not emit where the photoinitiator absorbs, the material will not cure properly, however powerful the lamp. UV adhesives and photoresists react at fixed wavelengths, so check the data sheet of your material before anything else.

The UV range splits into bands with different behaviour:

  • UVA, 315 to 400 nm: lower energy and the deepest penetration. The main band for industrial UV curing and lithographic exposure.
  • UVB, 280 to 315 nm: higher energy, acts at the surface.
  • UVC, 200 to 280 nm: the highest energy, used for tack-free surfaces and for disinfection.
  • Violet, 395 to 445 nm: the transition to visible light, used for some special inks.

Light sources also differ in how much of that range they cover:

  • Monochromatic: a single UV wavelength, with the energy concentrated where it is needed. A UV LED is the typical example: its wavelength is set precisely by its semiconductor material.
  • Multi-band: two, three or four wavelengths, each controlled on its own or together, for materials or tests that need more than one.
  • Broadband: the whole UV range plus visible stray light, as from a mercury lamp, which still emits between 500 and 600 nm.

Awellcure UV LED spot heads are available at 365, 385, 395 and 405 nm. Linear and area light sources come at 365, 385, 395 and 405 nm as standard, and at 254, 275, 295 or 310 nm on request.

2. Irradiance, time and dose

Two numbers describe how much light reaches the part:

  • Irradiance is the power arriving per unit area, in W/cm² or mW/cm². Think of it as the intensity of the light. It can reach 20 to 40 W/cm².
  • Dose (also called energy density or exposure) is the total energy delivered, in J/cm² or mJ/cm². It is irradiance multiplied by exposure time, measured within a given wavelength band.

Typical exposure times are 0.1 to 10 s. Irradiance and time cannot simply be traded against each other, though: weak light for longer and strong light for a shorter time give different results, because of the photochemistry of the material. Test with the irradiance you will use in production.

Every material has a dose window between a minimum and a maximum:

  • Below the window: the material stays liquid, or only a thin surface layer cures and it stays tacky underneath.
  • Inside the window: the best adhesion and surface properties.
  • Above the window: the coating turns brittle and cracks, its surface changes so it can no longer be printed over, and eventually it scorches.

When you compare light sources, compare UV optical power at the output in W or mW, not the electrical power drawn from the mains. Then confirm four points:

  1. The wavelength the material responds to.
  2. The minimum irradiance and power the material needs.
  3. The area to be irradiated: the larger the area, the more power the source needs.
  4. Whether you need flexibility for tests, which a multi-band source provides.

What sets the irradiance of a UV LED is the drive power, the efficiency of the LED chips, the size and packing of the chip array, the optics in front of it and, above all, its thermal management.

3. Geometry: spot, linear or area

The shape of the irradiated area decides how efficiently the light reaches the part. Choose it by the size of the area to be cured:

  • Spot: a concentrated beam with a set divergence, whose size changes with the lens and the working distance. For small bond points, local exposure and precision optics. See UV LED Spot and UV Lamp Spot.
  • Linear: a line of light that moves relative to the part and irradiates large surfaces evenly. For industrial coatings, encapsulation and scanning large semiconductor substrates. See UV LED Linear.
  • Area: a single exposure covers a large flat area at once, for fast processing. For large-area curing, parallel exposure and 3D printing. See UV LED Area.

Ring LED lights irradiate a part from all around. For batch work in an enclosed space, or for a continuous flow of parts, the same light sources are built into UV curing ovens and UV conveyors.

The guides to spot curing, linear curing and flood curing go into each geometry in detail.

4. Divergence, uniformity and working distance

  • Divergence decides how well the light can be focused. A UV LED spreads its light more widely than a laser, so lenses or other optics shape the beam to suit the application.
  • Uniformity decides how consistent the cure is. Intensity can differ between the centre and the edge of the irradiated area, which shows directly in quality and yield. A common way to rate uniformity is to measure the power at nine points across the area. Fly's-eye lenses spread a point source into an even field, and collimating lenses produce parallel light. In series production, Awellcure area light sources reach a uniformity of more than 92 %.
  • Working distance matters because irradiance falls as the distance between source and part grows, and the irradiated area changes with it. Fix the working distance early, and check the irradiance at that distance, not at the window of the lamp.

5. Light guides

With a light guide, the light source and the irradiated area are separate. The source stays in place while the guide head moves freely, so curing works on robots, on automated lines and in tight spaces. Transmission loss, length and bending radius all affect a guide, and it degrades with use, so choose it to suit the working distance and the way it is integrated. Awellcure's UV lamp spot curing system delivers its light through fibre optic guides.

6. Service life and cooling

Service life is defined by the decline in output, and the threshold differs by source:

  • A UV LED reaches the end of its life when its output has fallen to 70 % of the initial value.
  • A mercury lamp reaches it at 50 %.

So the same number of hours means different things for each. In practice, a mercury lamp lasts 1,000 to 2,000 hours and a UV LED more than 20,000 hours. Ambient temperature and humidity, the power setting, operating hours, the cooling and the internal feedback loop all affect how long a source lasts.

Cooling keeps the output stable. When the LED junction heats up, output falls, the wavelength drifts away from the absorption peak of the material and the LED ages quickly. The main options are:

  1. Air cooling: a simple design.
  2. Liquid cooling: essential for high-power sources, where the heat is concentrated.
  3. Thermoelectric cooling: for precise temperature control.

Awellcure linear and area light sources are available with fan or water cooling.

7. Control and integration

On a production line, the controller matters as much as the light source. Look for:

  • Independent channels: one controller driving four, eight or more heads, each with its own power and time.
  • Fine settings: irradiation time and power set in small steps, with programmes you can store and recall.
  • Line integration: control by MCU, PLC, PC, RS232 or RS485, start by foot switch or sensor, and signal outputs for working status and alarms.
  • Adjustable power: output adjustable from 10 to 100 %, optionally with irradiance monitoring.
  • Segmented control: on large heads, sections switched separately so only the needed area is lit.

8. Measure with a radiometer

A process window only helps if you can check it. Two measurements matter:

  • Dose: a UV energy meter records the energy accumulated over the curing cycle. It is the main evidence that a coating, ink or adhesive has cured fully.
  • Irradiance: a UV irradiance meter shows the intensity per unit area at any moment, so you can see the state of the source and catch the gradual loss of output before it affects quality.

Regular measurement helps you avoid both over-curing and under-curing and keeps quality consistent from batch to batch. Handheld and online instruments are in the UV Radiometer range; online meters connect to the PLC for continuous monitoring.

Checklist

  1. Wavelength: the response wavelength of your material decides between a monochromatic, multi-band or broadband source.
  2. Power: the minimum irradiance multiplied by the irradiated area decides the power class.
  3. Geometry: spot, linear or area, to match the part and the line.
  4. Details: divergence and uniformity, working distance, light guide, service life and cooling, control.
  5. Verification: a radiometer to set the process window and keep it.

Not sure where to start? Send us your material data sheet, the area to be cured and your cycle time, and we will recommend a system.

More Technology Guides

All guides
  • Technology Guide

    UV LED spot curing

    How focused UV LED heads cure adhesive exactly where it is dispensed, and how to choose lenses, wavelength and controller for precise bonding of small parts.

  • Technology Guide

    UV LED linear curing

    How a narrow band of UV LED light cures coatings, inks and adhesives as parts or webs move past, and how to size a linear source for your line speed.

  • Technology Guide

    UV LED flood curing

    How UV LED area sources cure whole parts, trays and coated surfaces in one exposure, and how to size the emitting area, irradiance and cooling.

Expert advice

Which curing technique fits your process?

Tell us about your parts, adhesive or coating and cycle time, and we recommend a spot, linear or flood system.